
Do you want to create a unique and interesting landing page? In this article, we will teach you how to make a landing page in WordPress.
How To Make a Landing Page in WordPress
Do you want to use WordPress to make a landing page? You can test different marketing strategies, increase site traffic, and convert that traffic into leads and customers by using well-designed landing pages.
Let’s jump in…
What is a Landing Page?
A landing page is a specifically created page to boost sales or provide leads for a business.
They frequently use paid marketing, email, and social media campaigns. This page will receive its first visitors from these sources, which is why it is referred to as a landing page.

Landing Page Types
Different landing page designs are available depending on your goal. They serve several functions such as selling and informing. There are several different kinds of landing pages, including:
- Because they promote the goods, splash landing pages (and even splash home pages) are made to appear like sparkling diamonds with film, animation, and visual effects;
- Squeeze landing pages solicit users’ emails and other information in exchange for a unique offer;
- Lead capture landing pages seek to build long-lasting relationships with leads to convert them into devoted clients;
- The goal of click-through landing pages is to guide visitors through every stage of the marketing funnel and onto the product page;
- Despite its terrible name, the “unsubscribe” landing page is a tool for enhancing the product;
- Long-form sales landing pages seek to address price issues, provide a thorough description of the product’s features, and discuss its advantages. Despite the dull name, they enable the use of all SEO tools and are full of in-depth reports and other comparisons;
- Thank you landing pages are designed to assist you in showing appreciation to your clientele;
- 404 landing pages represent a place for creativity and page redirection, not a dead end.
What Distinguishes a Landing Page From a Website’s Home Page?
A homepage is the first page visitors will view after typing your domain name into their browser. The majority of visitors to a landing page, on the other hand, may come from paid or external traffic sources.
Your website’s home page should entice visitors to browse other pages, look at products, or register. There are more links available, providing users with more choices.
On the other side, a landing page, also called a “squeeze page,” is created for higher conversion rates. It includes fewer links and is designed to let users buy something or give their contact details for upcoming outreach.
There can only be one homepage for your website, but you can make as many landing pages as you need for other campaigns.
For instance:
- A landing page for your paid advertising efforts
- A page for email list subscribers, social media users, and others who have arrived at a particular product or service page…
Let’s look at how to use WordPress to make a stunning custom landing page without prior knowledge of CSS, HTML, or PHP.
In order to create the landing pages, we selected the three WordPress plugins. These landing page builders are quick, simple, and reasonably priced for small enterprises. You can choose the approach that best addresses your needs.

WordPress Landing Page Creation: A Step-by-Step Guide
Now that you understand what landing pages are and why they’re helpful let’s go into how to make a dedicated landing page for your WordPress website.
Your landing pages can be made using Elementor’s visual drag-and-drop design tool.
Why choose Elementor over WordPress’ built-in block editor? There are a few reasons:
Visual, drag-and-drop design – You have access to a much more potent visual, drag-and-drop design editor with Elementor. You can ensure that every aspect of your landing page is excellent because you have more control over the design.
Blank canvas template – The block editor doesn’t, by default, provides a blank canvas for you to design your landing pages, but Elementor does. As was previously mentioned, hiding navigation on landing pages is a bright idea because it allows you to eliminate distractions and concentrate your landing page on encouraging readers to take a particular action.
Landing page management – You can access a much more potent visual, drag-and-drop design editor with Elementor. You can ensure that every aspect of your landing page is excellent because you have more control over the design.
Marketing elements – By default, the block editor doesn’t provide a blank canvas for you to design your landing pages, but Elementor does. As was previously mentioned, hiding navigation on landing pages is a brilliant idea because it allows you to eliminate distractions and concentrate your landing page on encouraging readers to take a particular action.
Landing page templates – Although Elementor makes it simple to create attractive landing pages from scratch, you also have the choice to import one of Elementor’s expertly designed landing page templates and then modify it to your requirements.
Before You Start
Before using the Elementor page builder to create your landing page, you must have a few items ready. Before constructing your landing page, take care of these three issues.
- An Active WordPress Installation
- Install Elementor Free Plugin or
- Install Elementor Pro
Note that using Elementor Pro is required to access some features. Even though the free version lets you do a lot, Elementor Pro gives you the ability to do a lot more. The free edition allows you to create landing pages, so you are good to go there.

Typical Sections of a Landing Page
Every landing page will be unique, and you can add many other elements to your Elementor landing page to customize it.
Here are some items you might want to add:
Hero: Without a question, this is the most crucial component of your landing page. The part that a visitor views before scrolling down the page are frequently referred to as “Above the Fold.” We will put the most crucial components here as a result. The subscribe form, title, and sub-title.
Services: Here, we describe our company’s primary services or characteristics in further detail.
Navigation Menu: Your visitors will find the navigation menu section greatly helpful as they explore any landing page area.
Testimonial: Social proof that your current clients are pleased with your service is provided in the testimonial area.
Portfolio: Show the visitors samples of your work so they can determine whether you are a good fit for their needs.
Footer: You should present them with another call to action because they have already scrolled down the page and want to persuade them to take the desired action.
Steps to Create an Elementor Landing Page
It’s time to put your knowledge of a landing page and the essential components into practice now that you know a bit about them.
Use the WordPress plugin Elementor to create a landing page that converts incredibly well by following the steps below.
Select your template
You are prepared to click on the edit with Elementor tab after setting up the WordPress page template to build an engaging and effective landing page for your website.
- You will be taken to the Elementor interface after selecting edit with Elementor; from there, click the left gear icon and choose Elementor canvas to access the blank page.
- Selecting the folder icon can add components to your landing page.
- After that, a pop-up for adding menus like “Blocks,” “Pages,” and “My Template” will display.
- There are two ways to construct your landing page. Either manually add each block using the drag-and-drop functionality, or use one of the pre-designed landing page templates (you will need Elementor Pro for this).
It can take a while to construct a landing page manually, and there’s a chance you won’t get the result you want. We advise beginners to use the free pre-built templates included in the Elementor library. You can be more imaginative when developing your landing page, and it can save you a lot of time.

To locate the landing page template, go to the search bar in the template menu. Free and premium templates are accessible; you may choose the landing page template based on your needs.
Add a New Page
First, select Pages > Add New, then select “Edit using Elementor.” To work on a blank landing page, scroll to the bottom of the page, click the bottom-left gear icon, and then select “Elementor Canvas” from the list of page layouts.
The primary, secondary, text, and accent colors can be adjusted from the site settings when deciding on the overall colors and fonts. The global settings will instantly be applied when you add a new widget to an Elementor area.
Build the Hero Section of the Elementor Landing Page
Your landing page’s hero section can be created with Elementor in one of two methods.
1. Manually construct the hero section by dragging and dropping Elementor widgets.
2. Select the pre-made hero section from Elementor’s available blocks list.
Build the Hero Section from Scratch
You can manually design the hero section with Elementor widgets if you are an expert seeking the utmost level of customization.
Choose a single or two-column section by clicking the “+” icon in the Elementor area to get started (preferable). You can display your headline, subheading, and image/video together in a two-column section.
To add headings, drag and drop two “header” widgets from the Elementor block area, one on top of the other.
Use the H1 HTML tag for the first heading, and for the subheading, use the H2 or H3 HTML tag. While the title should briefly summarize your services, the subheading will elaborate on that concept in two phrases.
Use the Ready-made Elementor Hero Section
If you’re making a landing page for the first time with Elementor, you can choose the hero section from the list of pre-made Elementor blocks. Follow these steps in order to achieve this:
- The Elementor content section will open when you select “Add Template.”
- Visit “Blocks”
- Select “Hero”
- Choose the hero block you want, then click “INSERT” to make any necessary modifications.
Customizing Elementor Blocks
Examine each block and alter it as necessary to fit your website. Some modifications you might want to make include:
- Title Content
- Images
- Colors
- Backgrounds
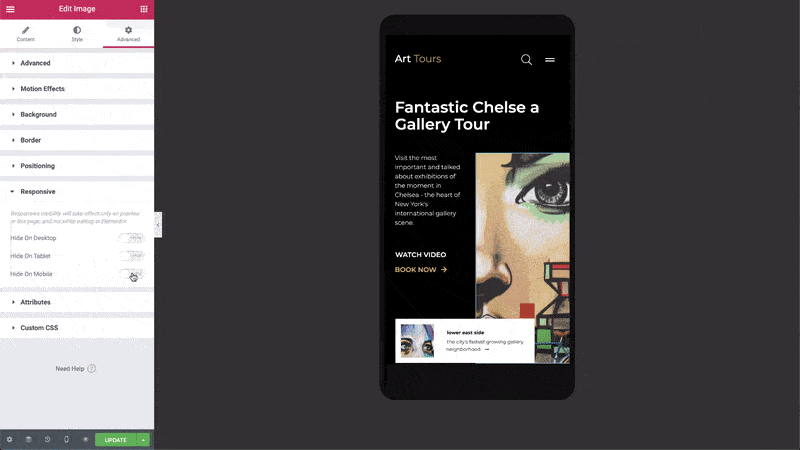
What About Mobile Customization?
No need to worry about altering each block and page separately for mobile use. Every block is already 100% mobile-responsive in design. The margins, padding, and other parameters can still be modified on mobile and tablet devices by switching to mobile view.
Create a Compelling Call To Action Button
Your users will click the CTA button or link on your landing page. Because of this, you must develop a captivating call to action button and position it such that it can attract the attention of your users and visitors.
Don’t forget to include a call to action, such as “download now,” “sign up,” “get it free,” “free download,” and others. Your landing page becomes more powerful and impactful due to its particular form of an action word.
About Area
There are no strict guidelines you must follow while creating the about part of your landing page. There may be one column or more in this section. You can add a headline, an icon, and some content depending on your needs.
The About Area can be created using Elementor as seen below:
- The Elementor content section will open when you select “Add Template.”
- Select “Blocks.” Select “About”
- Locate the “INSERT” button next to the about block you choose.
- Make the necessary content and style modifications.
Including team images and a pertinent video in this section is also a brilliant idea.
Designing a Features Area
On your landing page, it is crucial to highlight the critical aspects of your product or service. Providing the visitors with detailed information will enable them to behave by your expectations.
Let’s discuss how you can build your Elementor landing page’s feature section.
- The Elementor content section will open when you select “Add Template.”
- Visit “Blocks”
- Select “Features” from the list of options.
- Select “INSERT” after locating the features block that you prefer.
- Adjust as necessary to meet your needs.
Using Elementor Landing Page Templates Instead of Building From Scratch
Use the pre-made Elementor landing page templates provided by the Elementor page builder if you want to create your full landing page in a matter of minutes. These templates have been used to create numerous beautiful Elementor landing page examples.
You can select based on your budget because Elementor offers free and premium landing page designs. Additionally, premium and free Elementor landing page templates are well-suited for search engine optimization.
The Elementor landing page templates can be inserted as follows:
- In the Elementor content box, click the “Add Template” icon.
- Visit “Pages”
- To find “Landing Page,” enter the search term.
- Click “INSERT” after finding the landing page you wish to utilize.
- Change the text, the layout, and whatever else you like.
Adding Testimonials
You may utilize user testimonials as excellent social proof on your landing page. Testimonials can be added using the ready blocks and widgets in Elementor or ElementsKit:
Use Testimonial Widget
- Access Elements and select Search Widget.
- Enter the word “Testimonial” in the search box.
- Select the Elementor or ElementsKit testimonial widget.
- From the advanced tab options, add content, pick a style, and make any necessary adjustments.
Use Readymade Testimonial Block from Elementor
- In the Elementor content box, click the “Add Template” icon.
- Visit “Blocks”
- Select “Testimonials” from the list of options.
- Select “INSERT” after locating the testimonial block that you prefer.
- Adjust as necessary.
Contact Area & Contact Form
Every page on your site should include a contact form or a means for a client or visitor to contact you. We can quickly set up a contact form and adjust its layout to fit the entire website using Elementor’s visual form builder.
Using the built-in form connections in Elementor (requires Elementor Pro), we can connect it to an email marketing service like MailChimp without any issues.
How to make a landing page in WordPress – Conclusion
The Elementor page builder makes it simple to create landing pages. You can begin creating on one in a few minutes. With the tools provided by Elementor, you can quickly create a slick, tidy, well-designed landing page.
If you need help creating a landing page, get in touch with us.
How Clio Websites Can Help
Clio Websites is a full-service website design and marketing company. We have vast experience in responsive website design, website maintenance, WordPress development and speed optimization, and SEO. Clio specializes in creating landing pages, so contact us if you have questions regarding how to make a landing page in WordPress.
Our team is always happy to answer any questions, so contact us today.


