
Webflow is a no-code platform that puts the power of coding into the hands of anyone that knows how to use a computer. It prides itself on offering visual tools that can be used to create blogs, marketing websites, ecommerce stores, and membership sites. The majority of this advanced editing is done inside the Webflow Designer, a complex visual editor that gives you the ability to create and control how your website looks and feels. For those team members that don’t need such an advanced tool, the Webflow Editor and CMS empowers them to change text, update images, and add new content without changing layouts and functionality.
While Webflow mostly delivers on these promises, any good website owner knows that in order for a website to truly be a success it must have active users/readers. Therefore, good SEO is as crucial to a Webflow site as it is to projects built in WordPress, Wix, or Squarespace.
At HTML All The Things, we are no stranger to Webflow SEO as we use Webflow for several of our customer’s websites and even our own blog.
In this article, we’ll explore the technical side of Webflow’s SEO, taking a deep dive into its available SEO features and how to use them.
SEO-Friendly Titles and Meta Descriptions
Titles (aka SEO Titles) and meta descriptions are an important first step to making a good impression with Google and other search engines. They’re what make up the majority of your presence on the Search Engine Results Page (SERP) and should be written so that search engine crawlers will understand what your page is about and human readers will want to click to learn more.

If you’re using an SEO strategy, you’ll probably want to include your targeted keyword(s) in your title and description. Just remember not to stuff the keywords in there. For example, you don’t want your description to read as “keyword, keyword, keyword, keyword.” Instead, you should try and put your main keyword in the title and description once each, as long as it naturally fits in. Think of Google’s crawler as an analytical reader, it’ll pick up if you’re writing things that make no sense just to include your keywords.
Quick Note: Google can and will change your title and description that appear on their results pages if they feel that the page’s contents are better reflected by ones that they generate.
With all that said, how do we make sure our pages in Webflow get our desired title and descriptions? Below are three different methods depending on if you’re using the Designer, Editor, or CMS.
How to Add SEO Titles and Meta Descriptions in Webflow
Adding titles and meta descriptions to your pages varies on whether you’re in the Webflow Designer, Editor, or CMS. We’ll cover each of these in detail below:
Adding SEO Titles and Meta Descriptions in the Webflow Designer
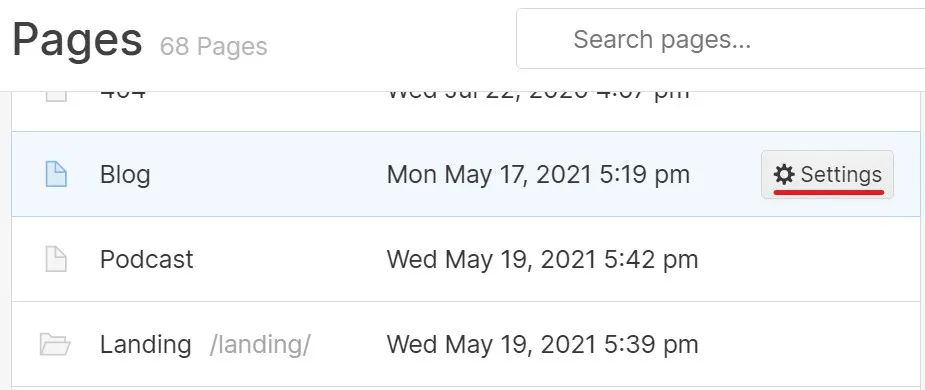
To add a title and meta description to a page while you’re in the Webflow Designer, open up the Pages menu, then hover your cursor over the desired page.
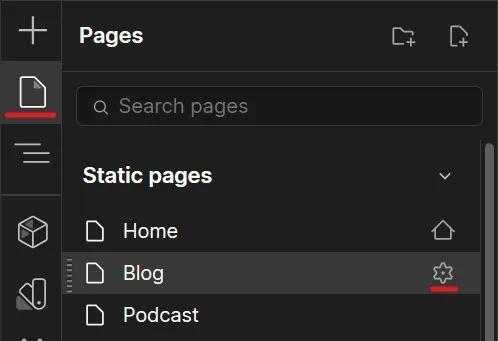
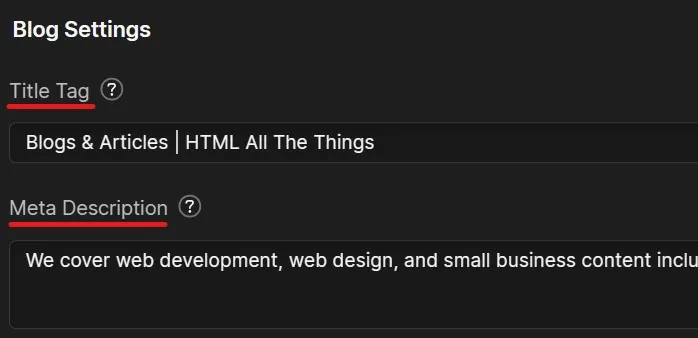
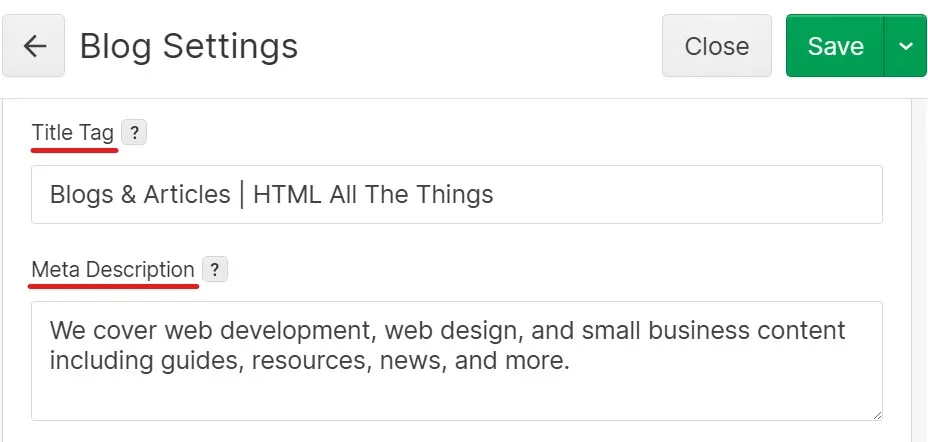
Click on the cog that appears and the page’s settings will open up. Here we can edit our page’s title and meta description via the Title Tag and Meta Description fields.
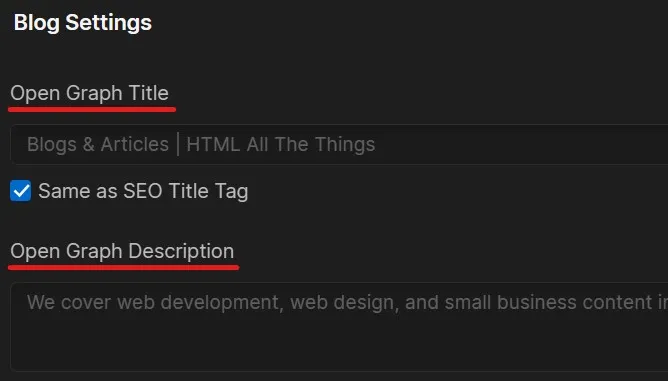
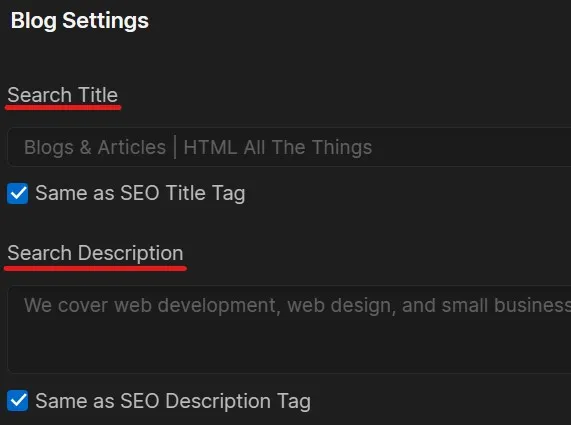
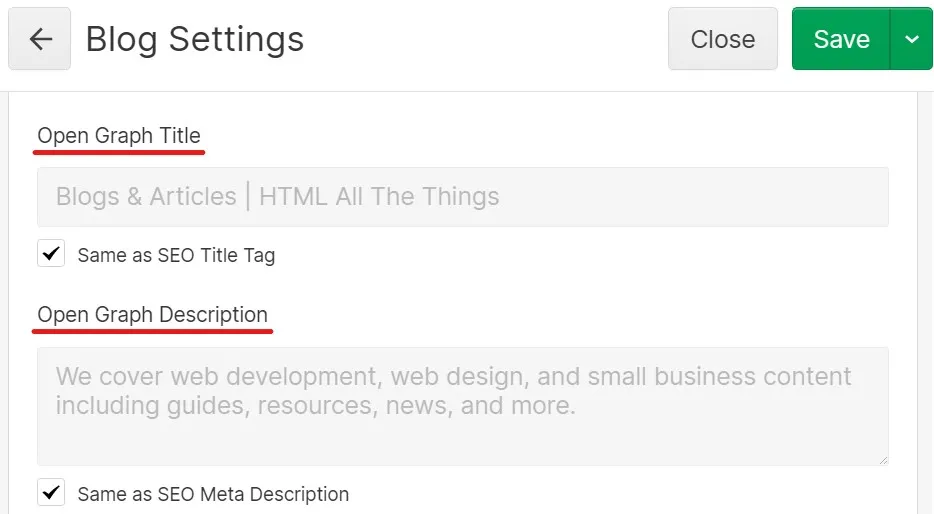
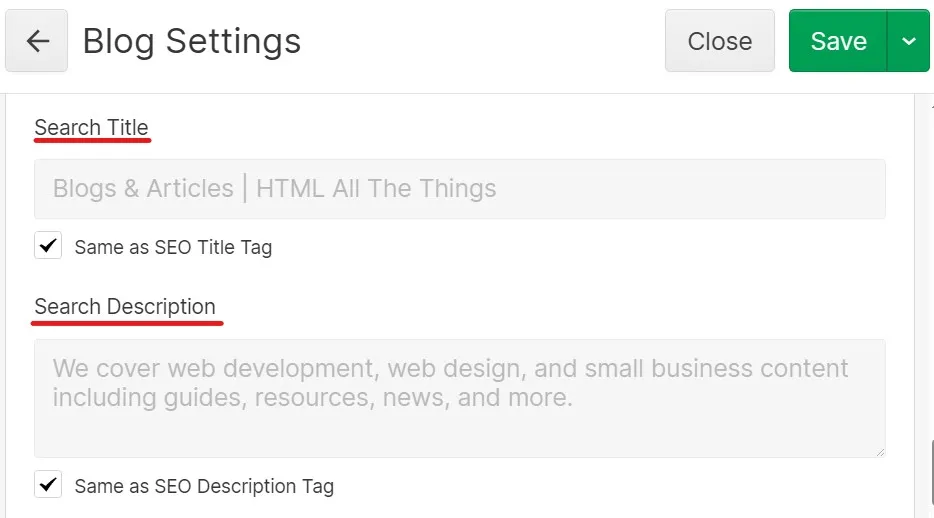
As an added bonus, you can also set your Open Graph Title + Open Graph Description and Search Title + Search Description from the same settings. You can set them to mimic the same settings as your title and meta description, or optionally set them individually.
Make sure to save the page and publish the site to make the changes public!
Adding SEO Titles and Meta Descriptions in the Webflow Editor
To add a title and meta description in the Webflow Editor, open up the Pages menu to list all the pages on your site.
Hover over a page to reveal the settings button that when clicked brings up a collection of options including the Title Tag and Meta Description fields where you can edit your title and meta description respectively.
Just like in the Designer, the Open Graph Title + Open Graph Description and Search Title + Search Description are available to edit here too.
Make sure to save the page and publish the site to make the changes public!
How to Add SEO Titles and Meta Descriptions in the Webflow CMS
Editing titles and meta descriptions is crucial for blogs that have contributing authors who don’t have Webflow Designer access. Without editing power from the CMS, all your blog posts will have the same title and meta description – this is horrible for SEO.
In order to edit titles and meta descriptions from the Webflow CMS, you must first start in the Webflow Designer, where we will set up the mechanism that allows CMS fields to fill in our titles and meta descriptions.
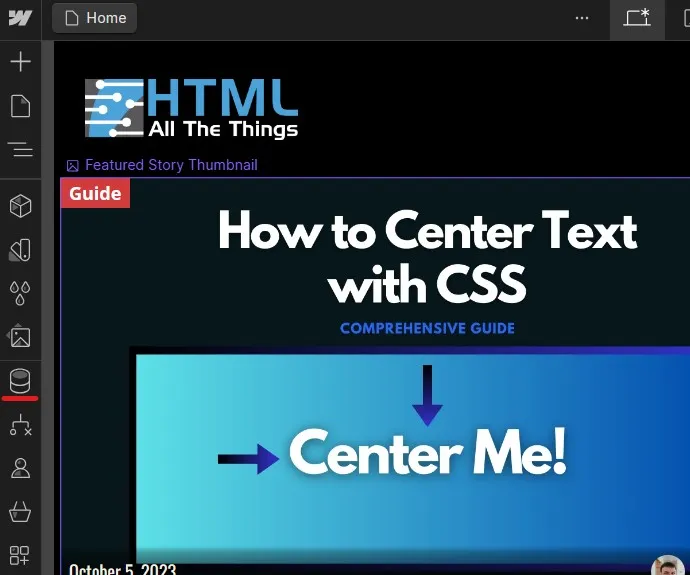
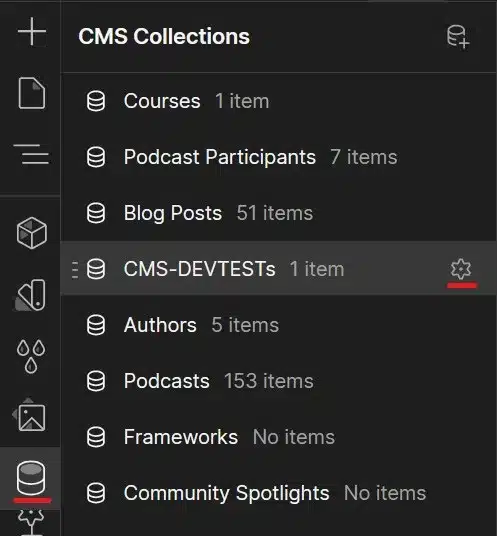
First we must add a field that the users can fill in for the Meta Description. Click on the CMS icon on the left side of the screen
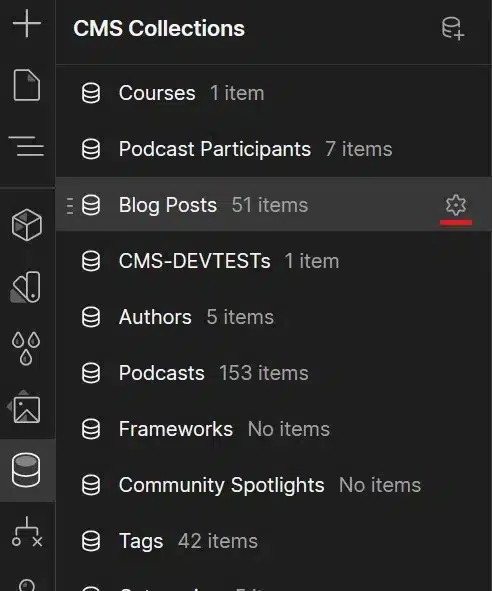
Hover over the CMS collection you want to edit and click on the settings cog that appears
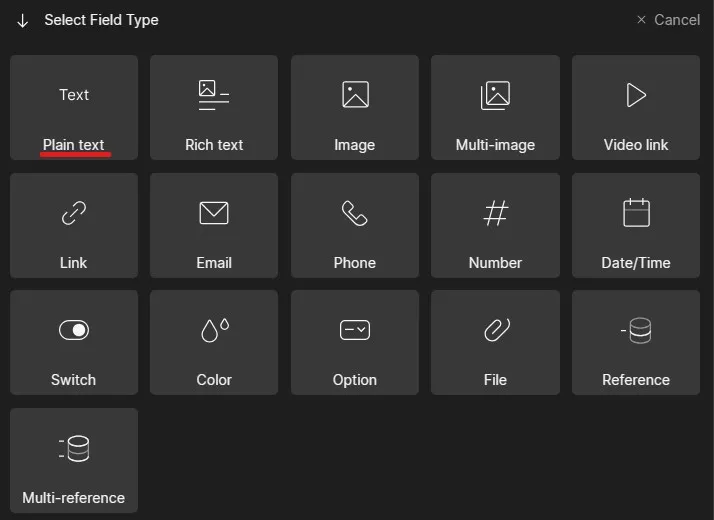
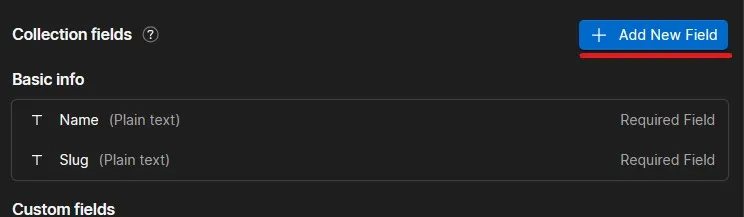
Click on the “+ Add New Field” field button and select Plain Text. Make sure to give it a descriptive name (ie Meta Description) and some helper text so contributing authors understand what the field does.

On my blog, I made it a single line field type and added a 160 character limit (see image below). Feel free to adjust these as you see fit according to your SEO strategy.
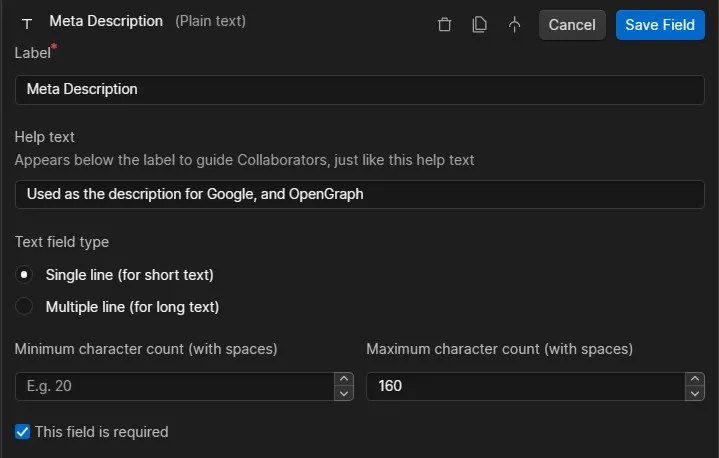
Make sure you save the field and save the collection!
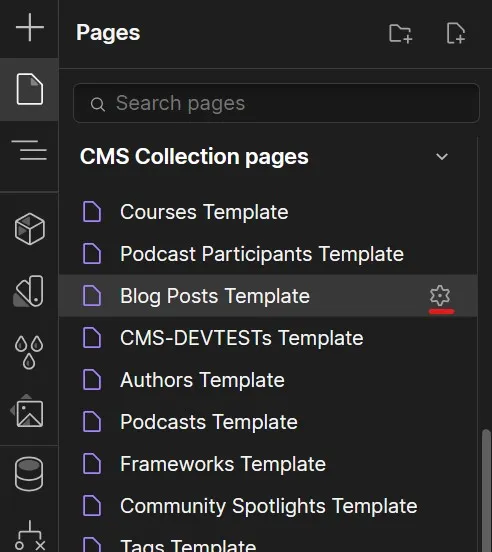
After saving, open up the Pages menu and find the appropriate CMS Collection page. Hover over it and click the cog that appears to open up its settings.
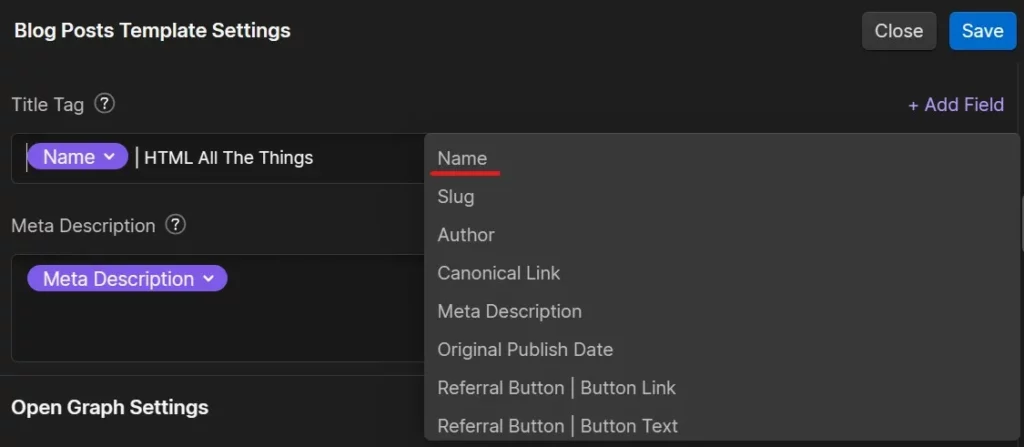
Find the Title Tag field and click the “+ Add Field” button beside it to open up a dropdown. From here we’ll select “Name” that will put a purple name label inside the field.

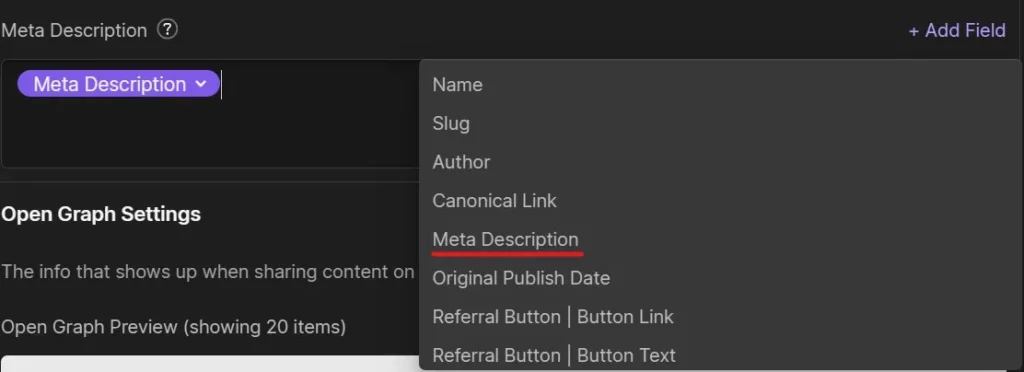
Find the Meta Description field below the Title Tag and click on the “+ Add Field” button. Then from the dropdown click on the field that you created earlier.

Please Note: You may notice that we haven’t added a name field like we did with the meta description. That is because all CMS items (ie blog posts) must have names, so it makes sense just to use those – but you can optionally create a different field if you want your name and SEO title to be unique.
Make sure to save the page to preserve our changes, and publish the site when you’re ready to make the changes public.
From now on, when someone makes a new blog post (CMS item), the name and descriptions they enter into the applicable fields will become that post’s Title and Meta Description.
How to Make SEO-Friendly Images in Webflow
Webflow has many of the same SEO-friendly tips that you should follow for images on other no-code platforms and custom websites such as:
- Descriptive image names so you show up in Google Images
- Efficient files that are compressed to save space and are converted into modern formats like WEBP
- Marking images as decorative, or having proper alt text
Unlike other site editors, like WordPress, Webflow does not take in your images and prepare different versions of them (ie thumbnail, small, medium, large). It also doesn’t compress, or convert your images for you automatically, so it’s recommended that you prepare your images to be as SEO-friendly as possible.
If you’re already using Webflow and have a lot of image assets that are not in the best format, Webflow does have a tool that you can use to reformat them all as WEBP, a modern image format that is ideal for websites and helps keep file sizes low.
Tips to Make Your Images SEO-friendly in Webflow
Below we’ll explore how to make your images SEO-friendly in Webflow.
Tip #1: Give your images descriptive file names
Give your images descriptive file names so that they have a chance of appearing in related Google Image searches. For example, instead of exporting your blog post’s thumbnail as a random string of characters like image1.webp, instead incorporate a related search string. If the blog is a guide on how to fix a flat tire we might use how-to-fix-a-flat-tire.webp
If you have a lot of images on your site already and you haven’t been doing this, I’d recommend doing this moving forward wherever possible, but it’s not likely to net you a lot of traffic, so you shouldn’t have to worry about going back and changing all your old images unless you’re trying to maximize your SEO, or if your niche relies on Google Image search.
Tip #2: Compress and Convert to WEBP
Images are alot bigger than text in file size and therefore can cause a page to load for a long time if they aren’t compressed and formatted correctly. If you use Google PageSpeed Insights, you’ll get a report on what images they suggest you convert over to WEBP format and which ones they recommend you compress to reduce file size.
To convert my images to WEBP, make basic changes (ie resizing), and do some compressing I use the GNU Image Manipulation Program (GIMP). GIMP is open source and free to use, it’s available to download here. Sometimes the file size I get out of GIMP is still a little too big, even after compressing, when that happens I use the free online tool TinyPNG.
Tip #3: Add alt text to all your applicable images
Alt text is a text description of an image that will be read aloud to people that use screen readers for accessibility. In addition to screen readers, alt text will appear in the place of images that fail to load, and they’re a great place to give crawlers context on what the image is about/portraying.
There are a lot of opinions out there on how to write good alt text, but for me, I find the best way is to write a description of an image based on how you would verbally describe it to someone – being quick and to the point is key. Another consideration is that images are often complimented by text, so I don’t want to reiterate what I’ve already stated in the text, as that information is redundant for people listening to the content on a screen reader.
For example, if I’m writing up a technical guide that describes how to access the backup screen in Webflow, I’ve already written up the steps to get to it, and the image serves as a visual aid. There is no need to describe the image further than something like “A screenshot of the Webflow Designer showing where to click to get to the backups screen.” Further details on the process have already been covered in the step-by-step text, so restating that information is redundant.
If the image is there to be looked at as the primary bit of content on the page, say for something like an art gallery, the purpose of the image is its visual presentation and therefore an alt description that goes into more detail on color, composition, and layout makes sense.
There are some cases where you should not have alt text on your images and that is when they’re present solely as a visual decoration. When this happens, you should mark them as decoration so that screen readers know to skip them and crawlers know they’re just a visual element of the page.
We’ll explore how to add alt text to images in detail below…
How to Add Alt Text to Images in Webflow
Adding alt text to images in Webflow can be done in a variety of ways whether you’re in the Designer, Editor, or CMS. We’ll cover most of these methods in detail below, but if you’re looking for any of the other methods, you can find them in the Webflow University.
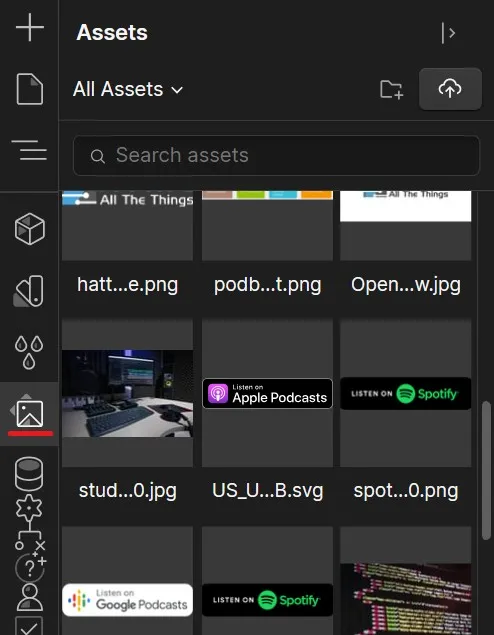
Adding alt text to images from the assets panel (Designer)
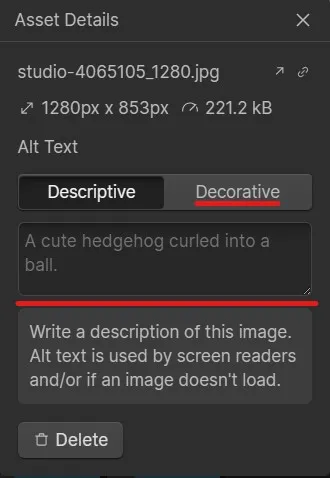
In the Webflow Designer, open the assets panel to find a list of all your images that you’ve uploaded. Hover over the image that you want to add alt text to and click on the cog icon that appears.
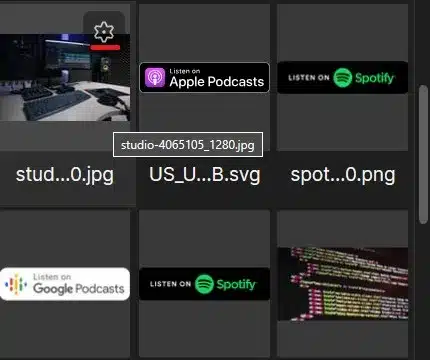
A small menu will appear where you can type in some alt text, or mark the image as decorative.
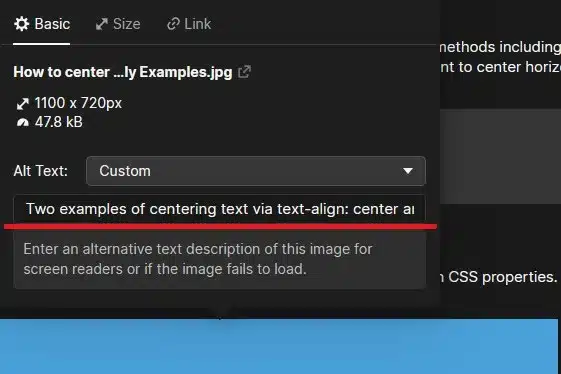
Adding alt text to images from the Webflow Designer
In the Webflow Designer, find the image that you’d like to add alt text to on the page. Click on the image to highlight it, and then click on the cog icon.

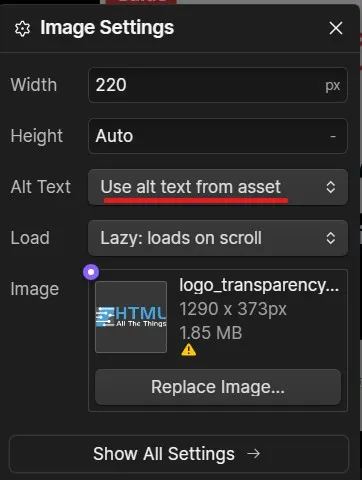
A small menu will appear where you can type in some alt text, mark the image as decorative, or tell it to take the alt text you typed in on the assets panel.
Note: If you’re trying to click on an image that was added via the CMS, you’ll need to use the Webflow Editor or CMS in order to add alt text to it.
Adding Alt Text to Images from the Webflow CMS
In the Webflow CMS sometimes you’re uploading images for an image field, multi-image field, or within a rich text field. The process for adding alt text to each of these differs slightly, we’ll be covering them all below.
Adding Alt Text to Image Field Images (Webflow CMS)
To add alt text from the CMS to an image that you’ve uploaded to an image field, we first need to do some configuration in the Designer.
Open the CMS panel then click on the settings for the CMS collection you’re working on by hovering over the collection and clicking the cog icon.
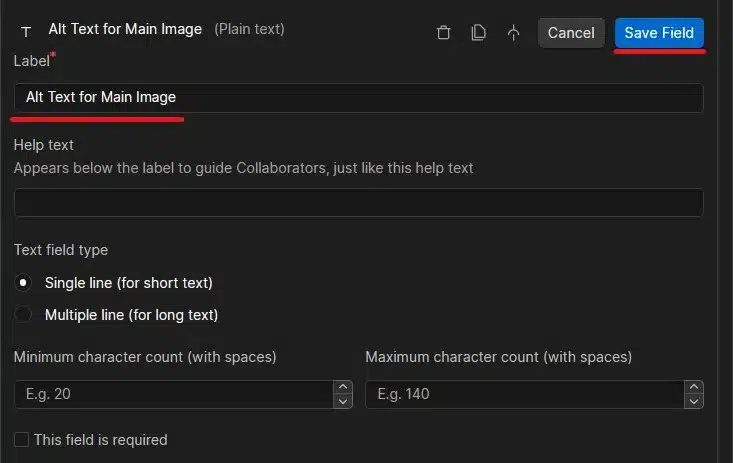
Click “+ Add Field” and select a plain text field. Enter a descriptive name (ie alt text for main image). This text field will hold the alt text for a single image field.

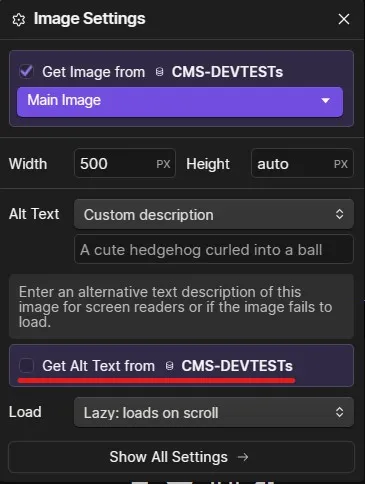
Save the field and the collection, then find the image you want to add the alt text to on the page.
Click on the image and then open its settings by clicking the cog icon. A small menu will appear where you can check the “Get alt text from [your-collection-name]” checkbox. From the dropdown list that appears, select the text field that we just set up.


Remember to publish the site to make the changes publish when you’re ready!
Adding Alt Text to Multi-Image Field Images (Webflow CMS)
In order to add alt text to images uploaded to a multi-image field, simply hover over the images you’d like to add alt text to within the field itself to reveal an overflow button.
Click on the overflow button and select “Edit alt text”

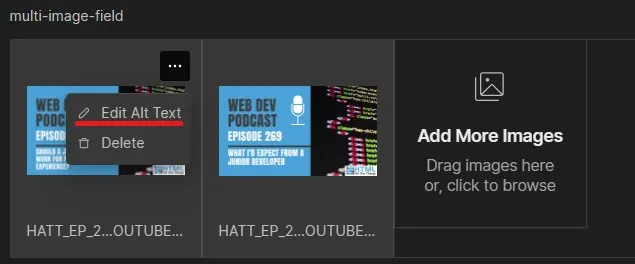
Fill in the text box that appears and press Enter on your keyboard.
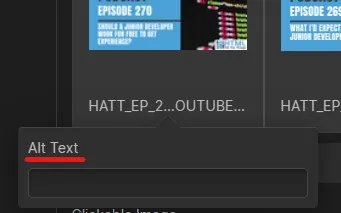
Remember to publish your collection item to make the changes public!
Adding Alt Text to Rich Text Field Images (Webflow CMS)
In order to add alt text to images uploaded to a rich text field, click on the image inside the field to reveal a small menu above it.

Click on the wrench icon, and the image’s setting will appear where you can edit the alt text.
Remember to publish your collection item to make the changes public!
Webflow Advanced Options for Good SEO
Whenever you go to publish your Webflow site, you’ve probably noticed the “Advanced Options” menu, that when clicked reveals five checkboxes to toggle off and on various settings. Some of these options can help your SEO, we’ll cover them below.
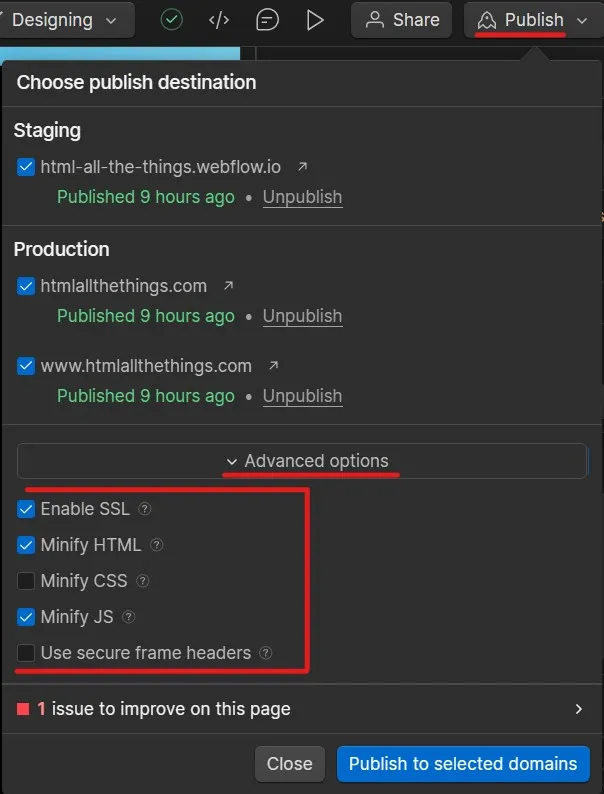
- Enable SSL – By enabling SSL you’re allowing your website to load in HTTPS, an increased security “mode” that should be enabled for virtually any website out there. It also carries with it some SEO benefits as Google seems to look favorably on sites that use HTTPS rather than the less secure HTTP.
- Minify HTML – Minifying your HTML can help your site load faster as it reduces the file size of your HTML. It does this by removing unnecessary characters and elements (ie whitespace) from the file. Increased efficiency like this is always a welcome by site readers and search engine crawlers. Please note that your HTML will be less human-readable.
- Minify CSS – Similar to Minify HTML above, this options minifies your CSS so that it reduces your CSS file size to increase loading speeds. Like HTML minification, CSS minification also makes your code less human-readable.
- Minify JS – Just like Minify HTML, and Minify CSS above, but for your JavaScript code.
- Use secure frame headers – Secure frame headers limit where your site can be embedded to help mitigate clickjacking attacks. While not a direct SEO contributor, added security features like this can help with a site’s overall security, something Google looks favorably upon. If you do need to iframe your website, you may need to switch this option off.
FAQ – Webflow SEO
Is Webflow good for SEO?
Webflow is good for SEO as it provides you with a lot of no-code tools and features to help configure your site for successful searchability. It is criticized when compared to other more mature platforms like WordPress, for example, as the amount of third-party SEO tools available to Webflow is in shorter supply. However, for many websites, Webflow’s built-in SEO features are more than enough.
Does Yoast SEO work on Webflow?
Yoast SEO is one of the most popular SEO plugins for WordPress and Shopify, however, it does not have official support for Webflow.
Are there SEO plugins for Webflow?
Yes, Semrush is a popular SEO plugin for Webflow that lets you manage keywords, track page speed, and more.


